Dalton, OH | zone 6a
Over the past year and a half I have been doing a lot of research into the “Organic No-Till” concept. No-till has a number of different meanings but for my specific situation it means getting beds set up the way you want them and then not inverting the soil with standard deep tillage ever again while using compost and mulches to keep the ground eternally covered. Sounds great, right? I think so too.
The main drivers for the change in approach were two: 1. Tillage. I hate seeing the soil structure blown up each year. 2. Weeds. I have had serious trouble keeping on top of the weed pressure in our produce. I have so many things that I’m doing in addition to our produce operation and so I needed a system that would save me time and frustration when it came to weeds.
This past summer I did a pro-con analysis to figure out if this was a good idea because it takes a ton (many tons, actually) of up-front work to get it set up and it’s tough to change once it’s in place.
Pros:
- no tractor needed
- reduced weed pressure: every year your weed seed bank gets smaller because you’re not bringing up weed seeds into the germination zone
- increased biology and quality of soil structure: tons of other pros result from these two things
- no soil crusting (carrot germ esp.)
- zero erosion
- deep mulch provides a massive amount of organic matter and water holding capacity
- no waiting for the soil to dry out in the spring to prepare beds and plant
- carefully set up rows will always be straight with a uniform width and length which will greatly reduce the anxiety in my anal retentive brain.
- aesthetically pleasing
Cons:
- you’d better set it up the way you want it to be for years to come.
- lots of front end work to get things set up
- need a free or cheap source of carbon for the aisles because it will take many tons (wood chips especially)
- high front end compost expense
- are we over-fertilizing with compost?
- will seeds germinate in compost?
- potential difficulty flipping beds (ie: what to do with standing broccoli stems or a bed of old baby greens?)
- limited to broad fork to loosen up soil in the early years as your soil builds (does anyone enjoy this?)
- scalability? Is this limited to micro-scale farming?
So, this fall I decided to go for it. I’m in the process of turning about 0.3 ac. into no-till veg. The plot is roughly 110′ x 155′ and it’s divided into two sections. The first section is a three position set up for our movable tunnel coming in 2020. Three 7-row blocks of 3′ x 48′ beds with 12″ aisles. This row/aisle set up should help us maximize the tunnel without getting overcrowded.
The second section is blocks of 3′ x 100′ beds. No decision plagued me like the width of these beds. Seems like everyone is doing 30″ beds but the decision came down to the width of my caterpillar tunnels. since I was going to be moving my cat tunnels within the plot every other year, I decided I had to standardize the beds so the tunnel could fit over any section of three beds. So, for 2 years a section of three beds would be outside then the next two years they will be under the tunnel, etc… Many people have four beds in a 14′ wide cat tunnel but since I will mainly be doing tomatoes and cukes in the cat tunnels I opted for three beds per tunnel, and 3′ made more sense because 4 rows of tomatoes in a cat tunnel is way too tight. And 3′ wide beds allow me to do three rows of certain crops when the rows are not under roof.
Setup: I fortunately have access to over 200 tons of wood chips that tree service companies have been dropping off for three years now so I knew I wanted to use that. Also, I make my own compost from our cattle manure so I had that as well. But the secret sauce for me is “leaf humus” or “leaf mold” which is just very well broken down leaves– so well broken down that it is more like black soil than anything resembling leaves. This is the stuff that I’m hoping will help overcome two common critiques of no-till:
1. “You guys are going to overload on P & K with that much compost.” Leaf mold is very low in NPK, it’s mostly just carbon, and so it can be used as the top layer above the compost layer in any ratio that is necessary.
2. “Seeds aren’t going to germinate in compost.” That is often very true and something people should be aware of. I believe the reason to be that the nutrients are way too concentrated and it is often not fully broken down. Leaf humus is low in nutrients and has the consistency of potting soil making it a great medium for starting seeds.
The best place I’ve found for high quality leaf humus is Paradise Lawn Care in Smithville, OH. $22/yd contractor rate.
There are, I’m sure, many ways to set up beds but here is the method I settled on after, probably too much, thought.
- In a perfect world I would do this setup the year before. I started mine in the fall for spring production. Your soil will have time to stabilize (mineral amendments will be more available and tied up N will be released) and with the addition of winter kill cover crops in the fall your soil will be in good shape in the spring.
- chose a well-drained spot. If it needs drain tile, do it. DIY or hire someone. Do not try to save money here.
- Add mineral amendments according to your needs based on a soil test. Gypsum, lime, and boron for me.
- Deep rip with a chisel plow to loosen soil and incorporate amendments. (No-Till note: You should follow the No-Till Market Garden podcast by Farmer Jesse. He often uses the phrase “no dogma” when it comes to no-till veg. production. People can go off the deep end of no-till purity and decide they will never touch the ground with any tool EVER! I strongly suggest that you use deep tillage to set up your beds. It will loosen up compaction and help get your mineral amendments down into the ground where they are needed. Remember, you’re only doing this once to get things set up. Lay the foundation right so you don’t have to come back through later and jack up the house and lay new block, if you know what I’m saying.
- disc to level out ground.
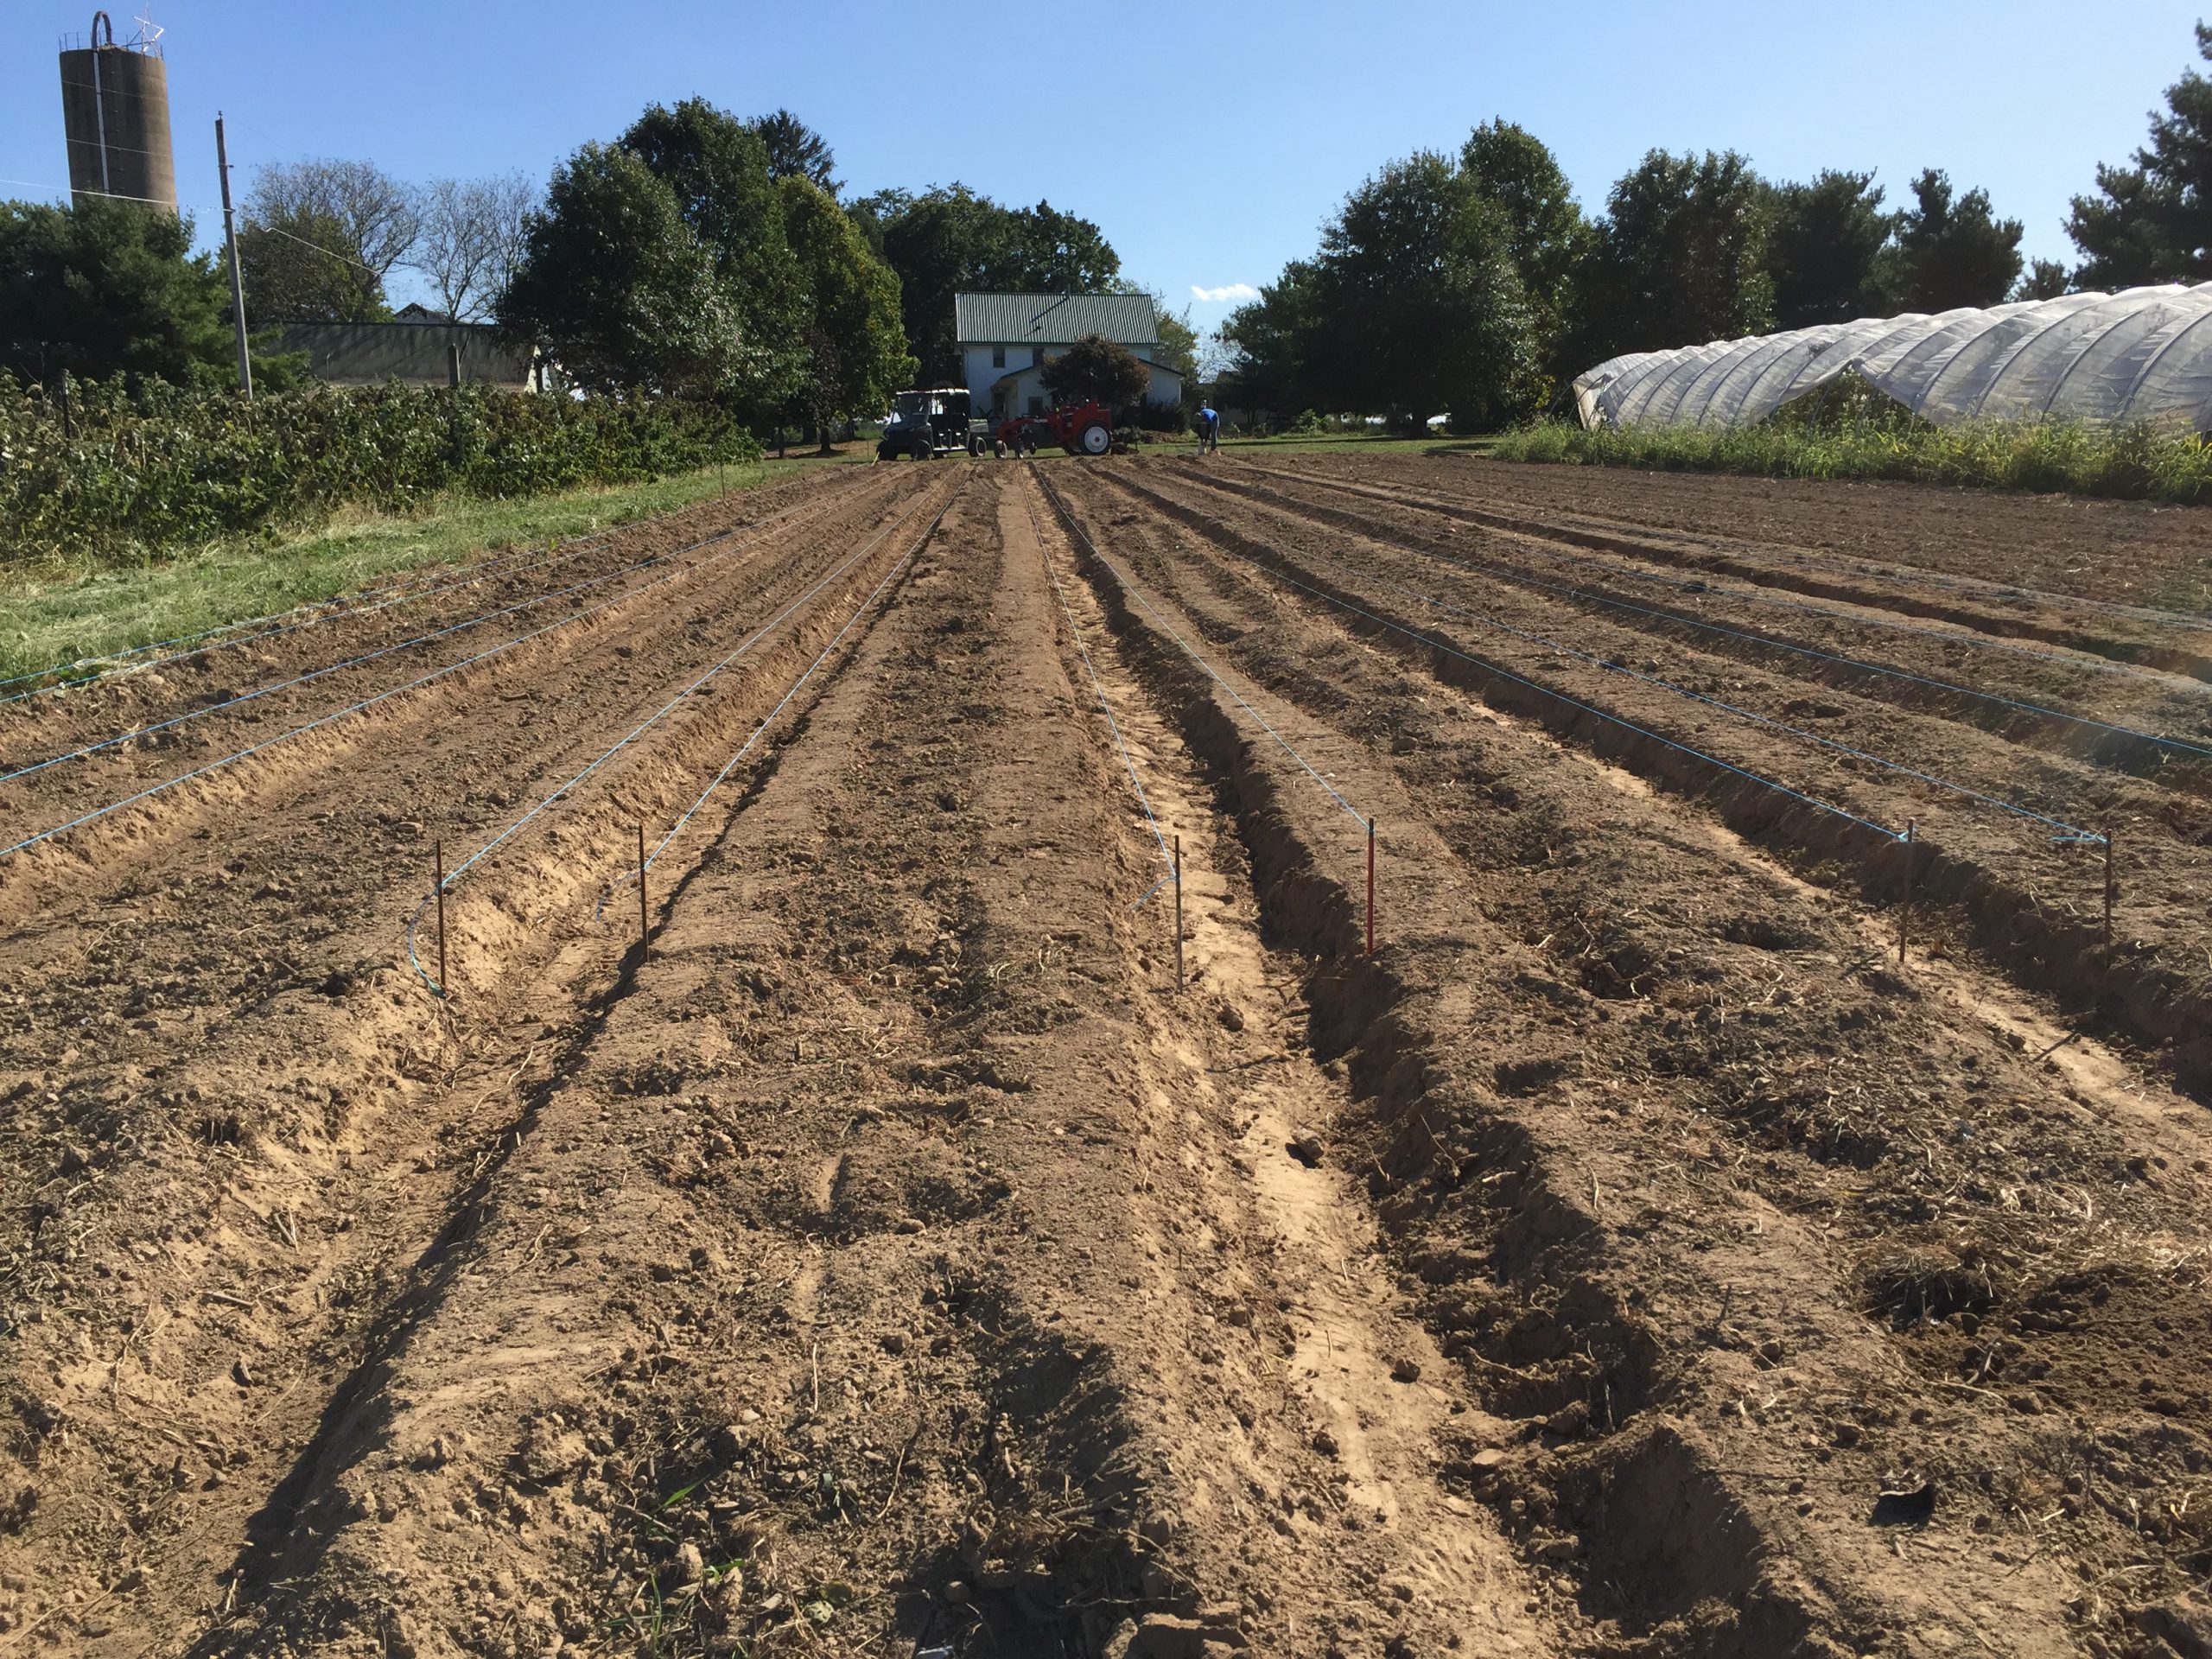
- shape beds with the dimensions you want. I use a Tilmor 520 tractor and their bed shaper attachment. The taller you make your beds the more wood chips you’ll need in the aisles to match the height.

7. Wave goodbye to that bare soil!
(I tried several methods from here but I liked the one where I let a section of beds sit for a week and a half until I could see weeds germinating and then I applied the compost on the beds and chips in the aisles)
8. I chose to add blood meal to the beds and the edges of the beds because there will be a lot of contact between the soil/compost in the bed and the wood chips in the aisles and I wanted there to be plenty of N to go around.
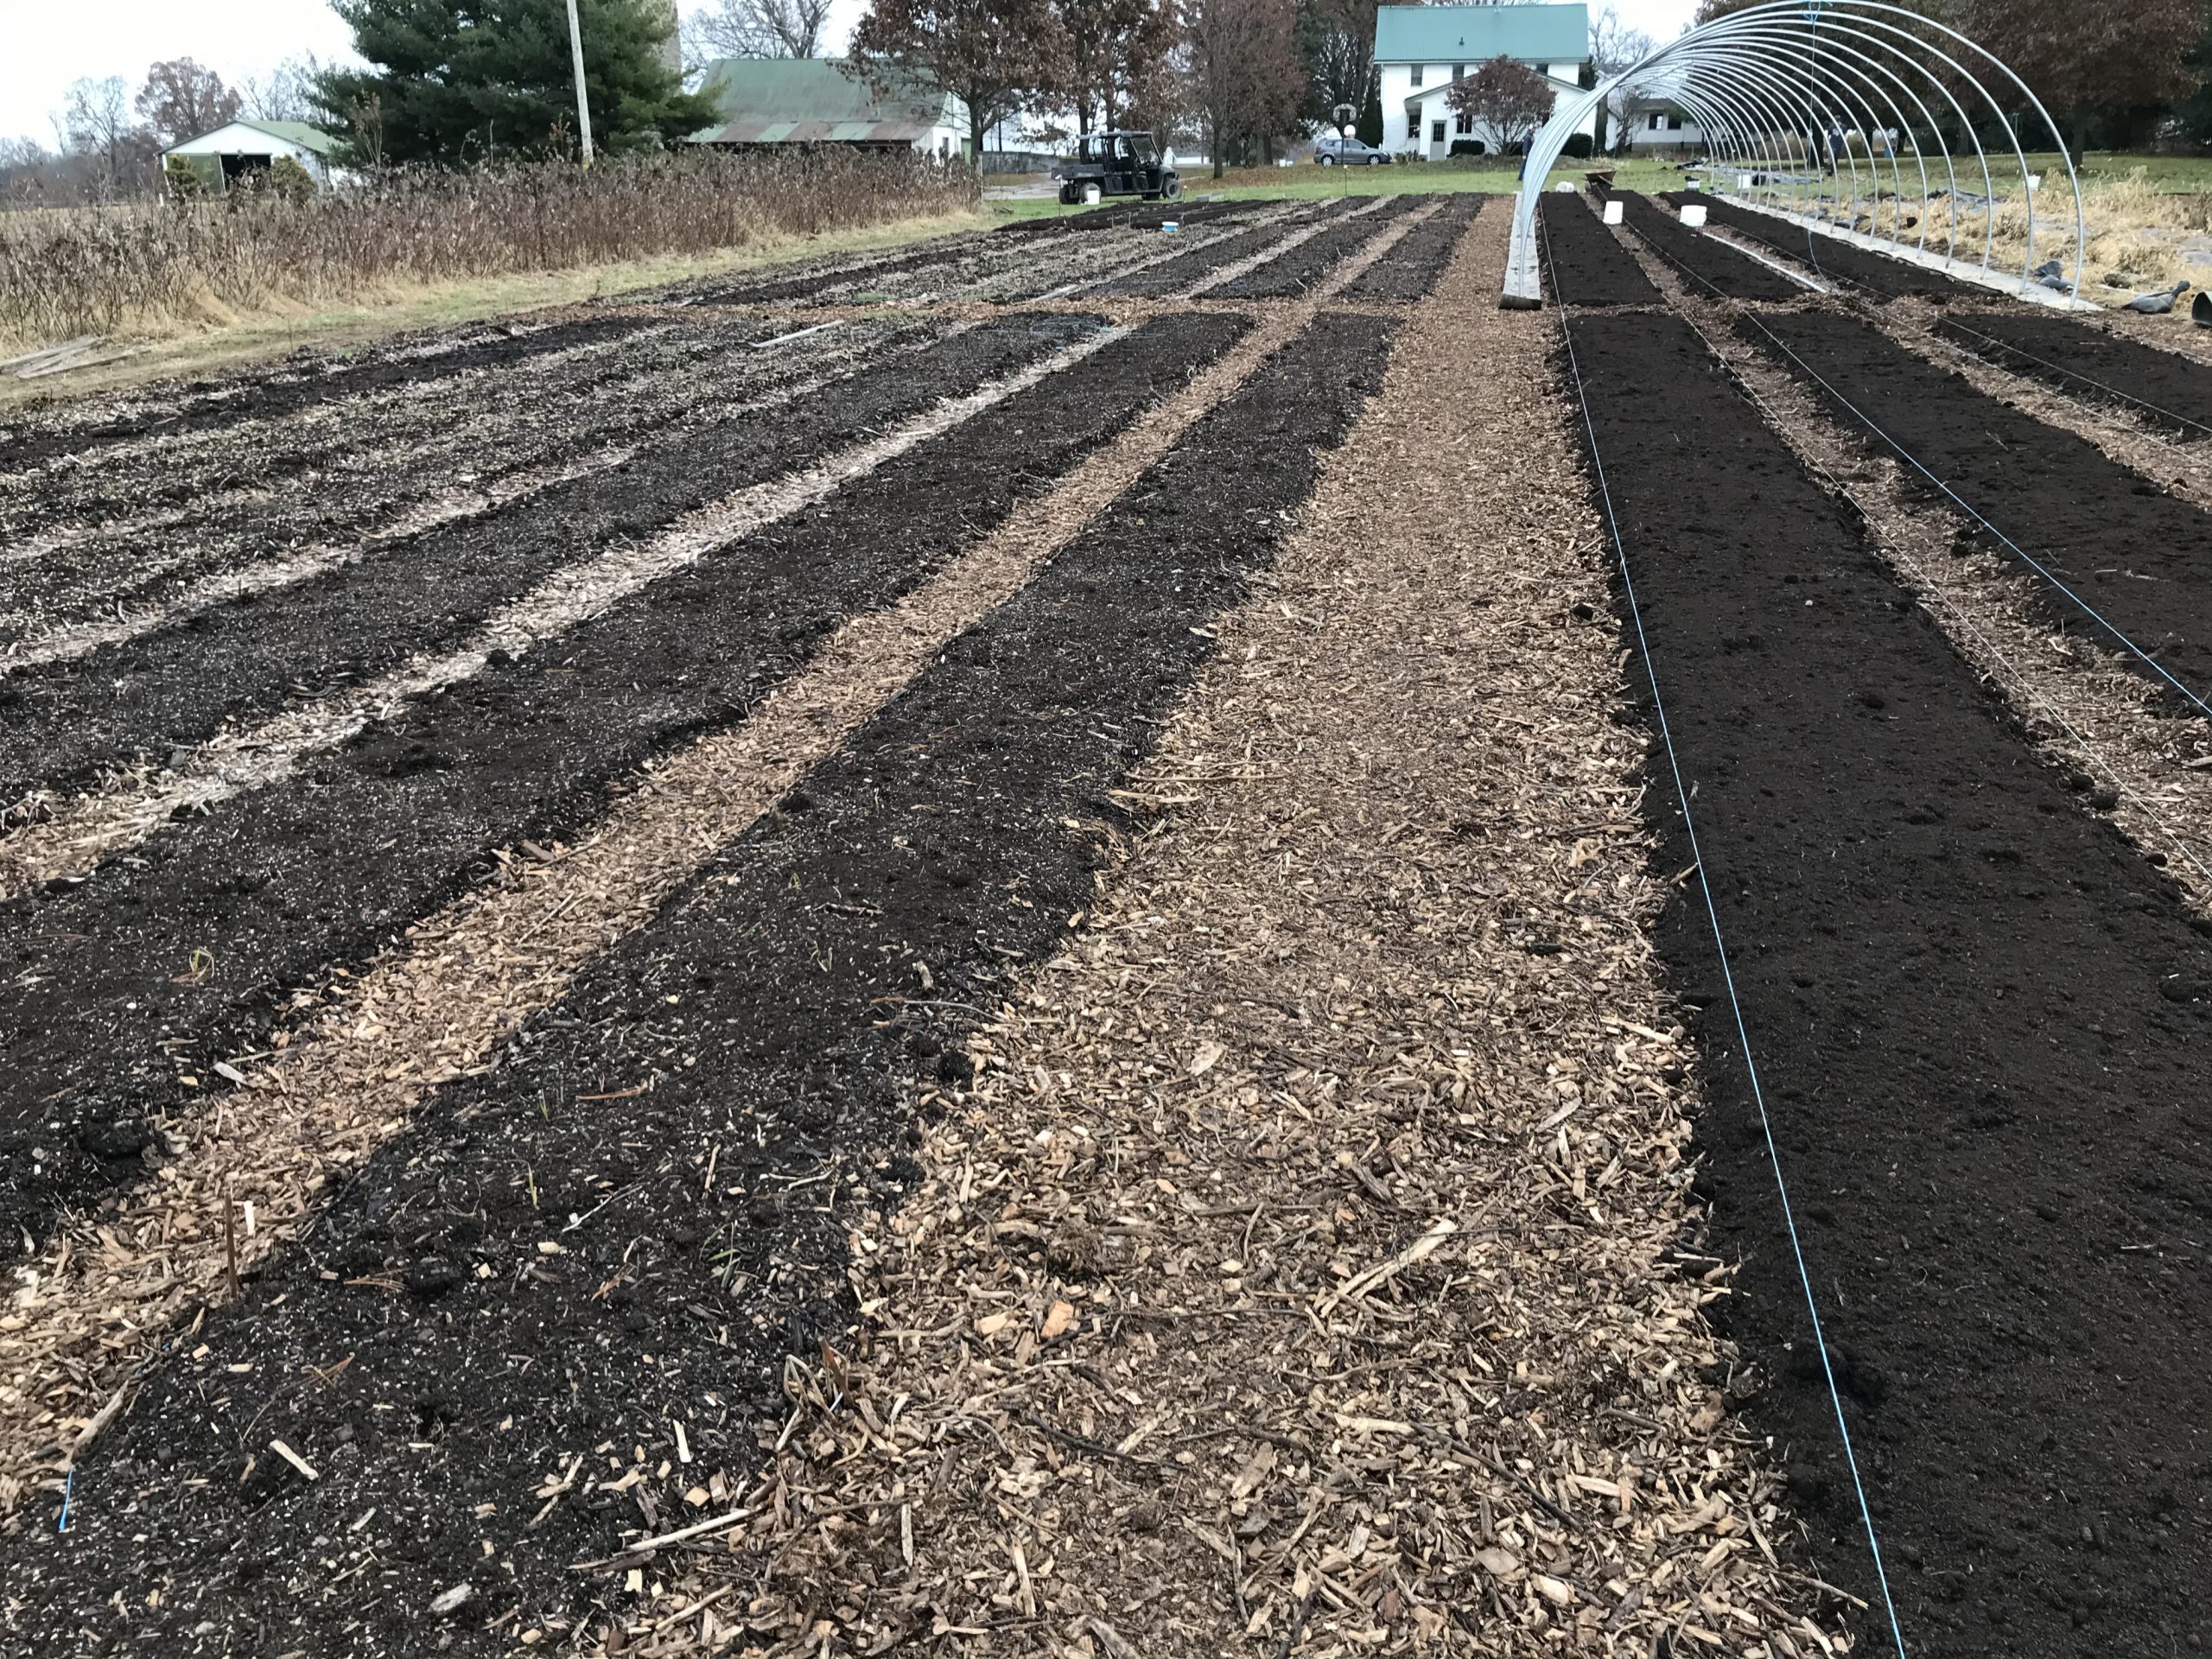
9. String beds to exact dimensions and then straighten out your rows with a flat shovel so they’re perfectly straight 🙂 Cover the beds with up to 2″ of compost. Now, you will need to determine the ratio of compost to leaf humus. depending on your soil test, you can add more or less compost but make sure that the leaf humus goes on last and is at least 1″ deep. the total depth of compost/leaf humus should not be less than 1 1/2″ or you will still have some weed pressure. 2″ total depth above soil line is preferred
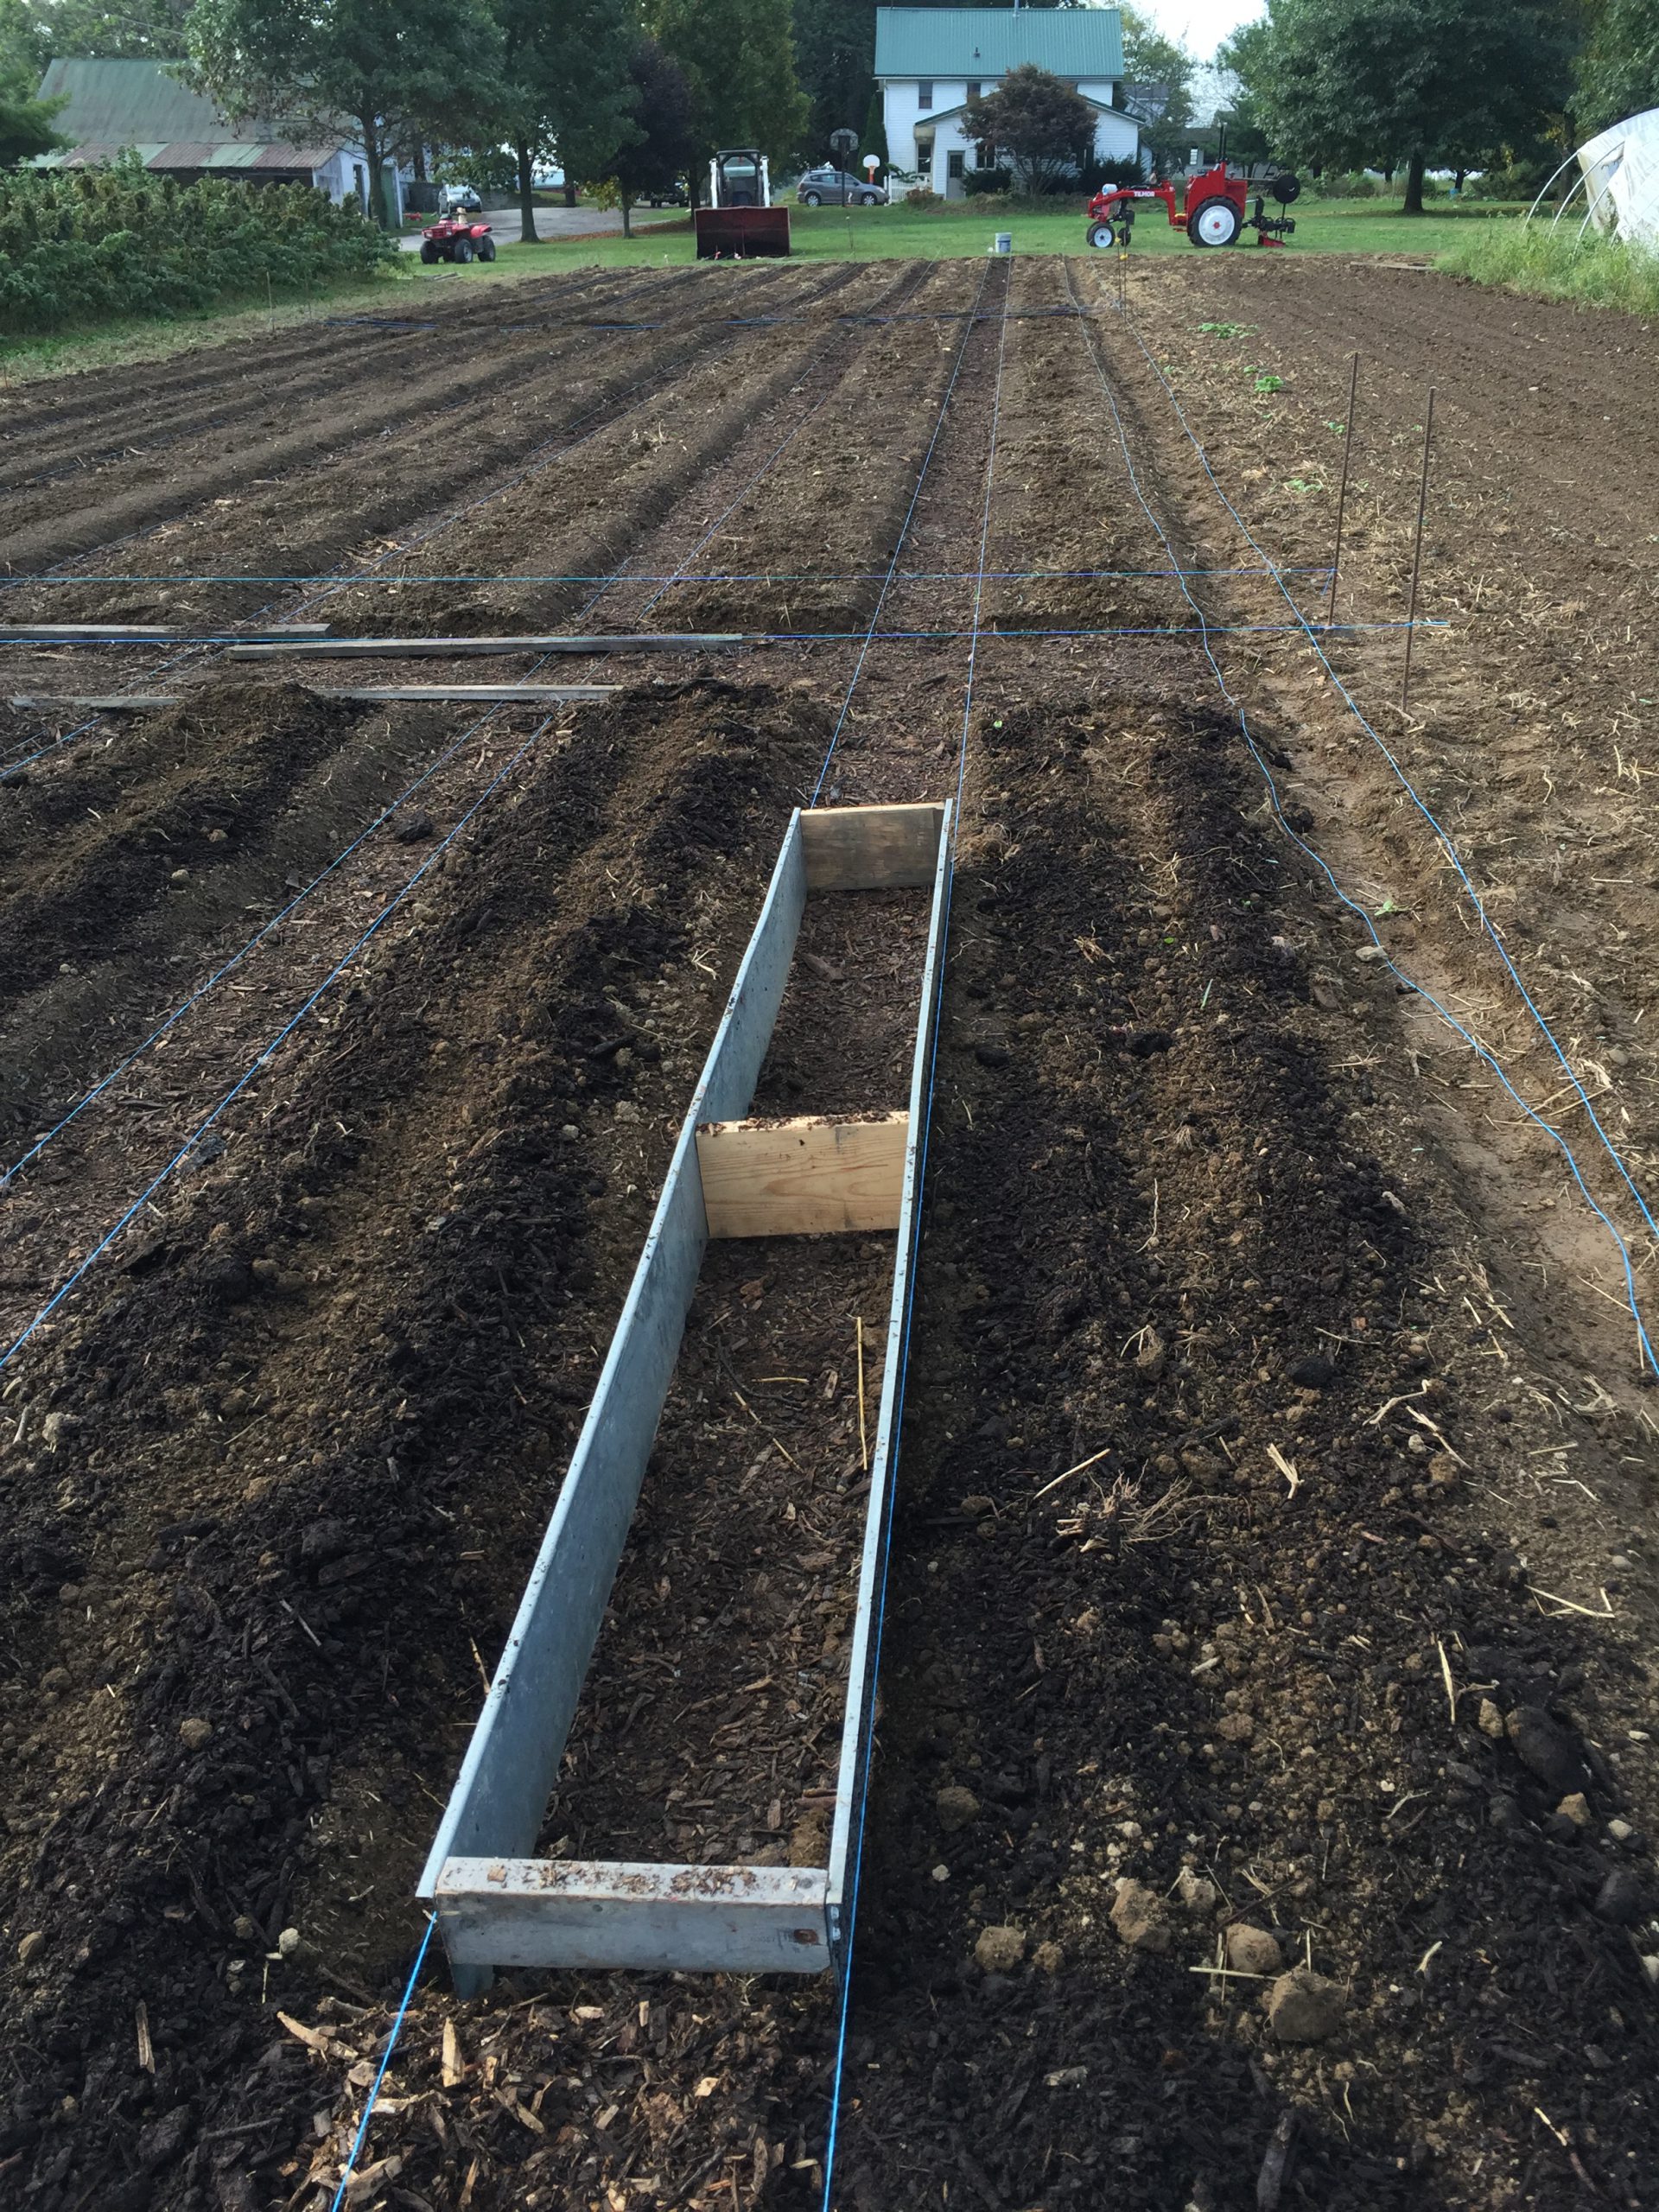
 10. Fill in the aisles with at least 5″ of wood chips. I did more like 7-8″ and I used the oldest wood chips I had for the bottom to so they would break down faster. ***I made a galvanized steel box for keeping the compost/leaf humus and wood chips separate as I was laying it down. The box was 10″ deep, the width of the aisle, and as long as I could manage (10′ in my case). I would set it in the aisle, on the dirt, and then fill it up 3/4 of the way with wood chips. I would then put compost along the outside edge (in the bed) and then pull the box straight up and out so the wood chips and the compost don’t mix. Then fill in the rest of the bed with compost.
 11. 1″ of leaf humus on top of compost.
12. plant fall cover or winter annual cover if you want
13. Done!
This project has only just begun. I will update as challenges arise this spring that I hadn’t planned on. Happy New Year!
